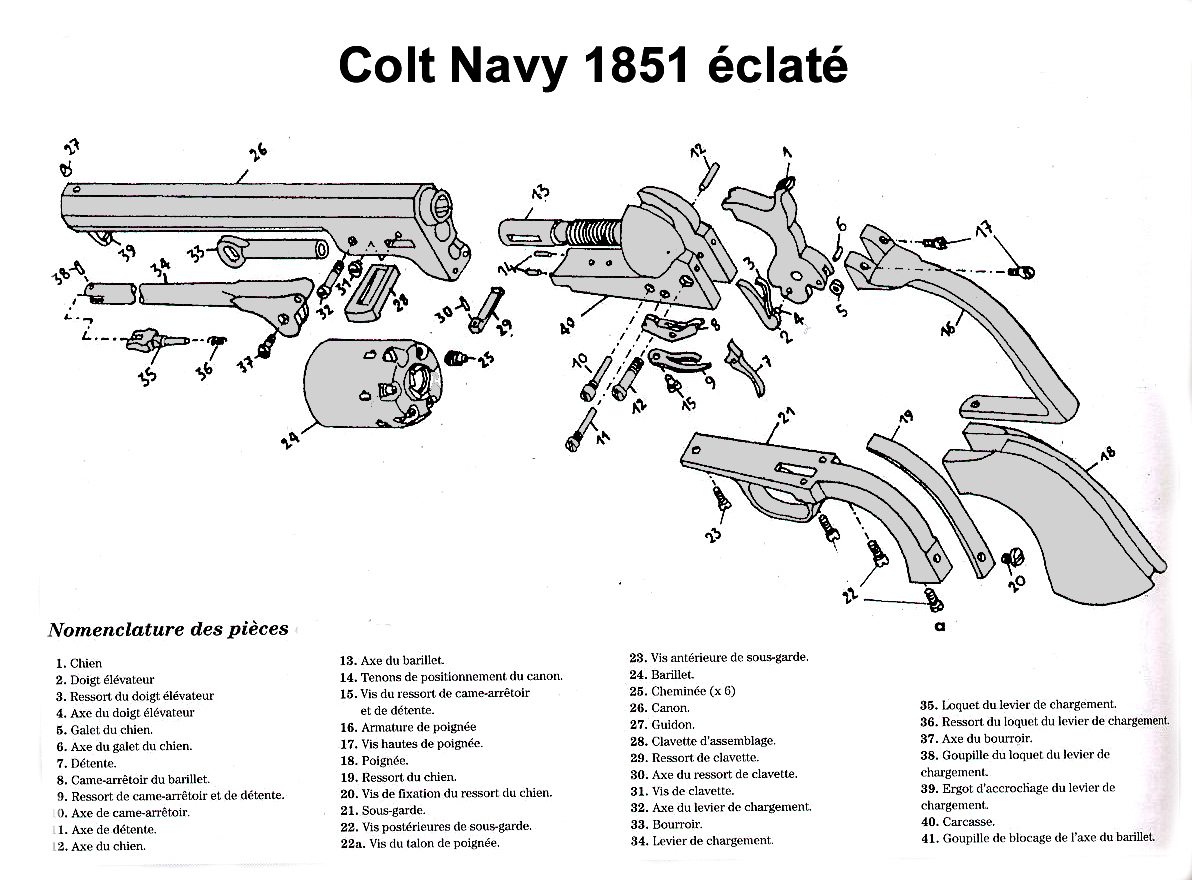
 |
|
|

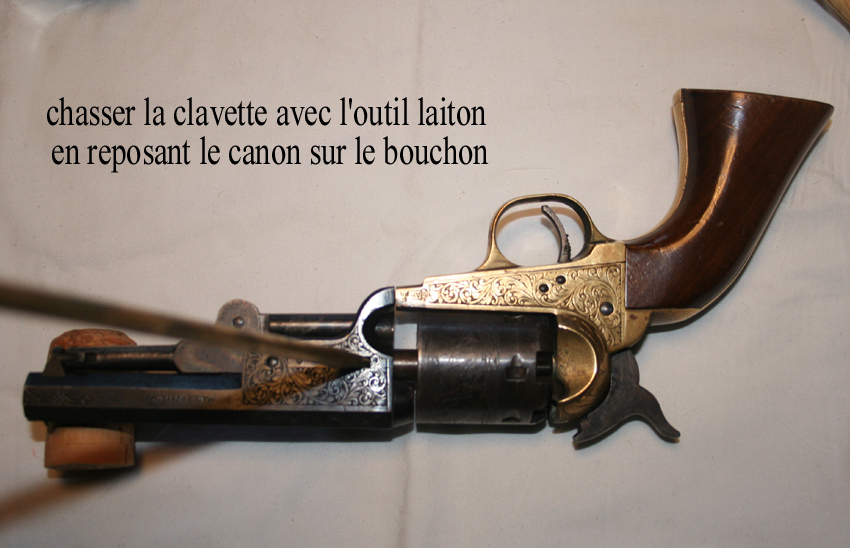
If the
key resists when fully inserted on the right side, continue to
chase it with a small flattened brass rod, no steel you would
irrevocably mark the tan and the steel of the barrel console.
D-Once
the key has been removed, unlock the loading lever (34) and place
the end of the drum (33) between two barrel chambers.
If you are afraid of marking the barrel by this maneuver, place
a wooden or cardboard tongue between the drum and the drum, and
leverage by pressure or small blows from the mallet to release
the barrel assembly (26) from its tenons. Positioning (14)
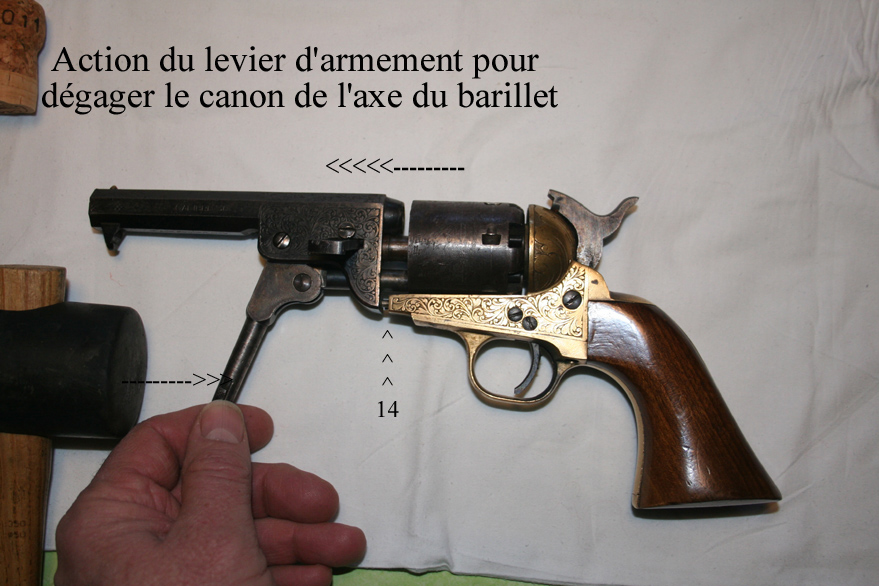
E-Remove the barrel (24)
F-Chimneys of the barrel must
be dismantled regularly and oiled at reassembly not necessarily
with each shooting session but at least monthly if one pulls often.
This is to avoid an oxidation of the pitch of the
chimneys which would definitely block the chimneys, that nevertheless
it will be necessary to change these ones being used with the
repeated blows.
The chimneys are only dismantled
with the appropriate key, Of this one, do not try other tools
that could only deteriorate them.

G- Sometimes
it is necessary to disassemble the drum to remove the powder residue.
Unscrew and remove the axle of the loading lever (32) Remove the
drum from its housing. If necessary, unscrew the axis of the drum
for cleaning and oiling.
H- Rebuild the dog which
releases part of the tension of the dog spring.
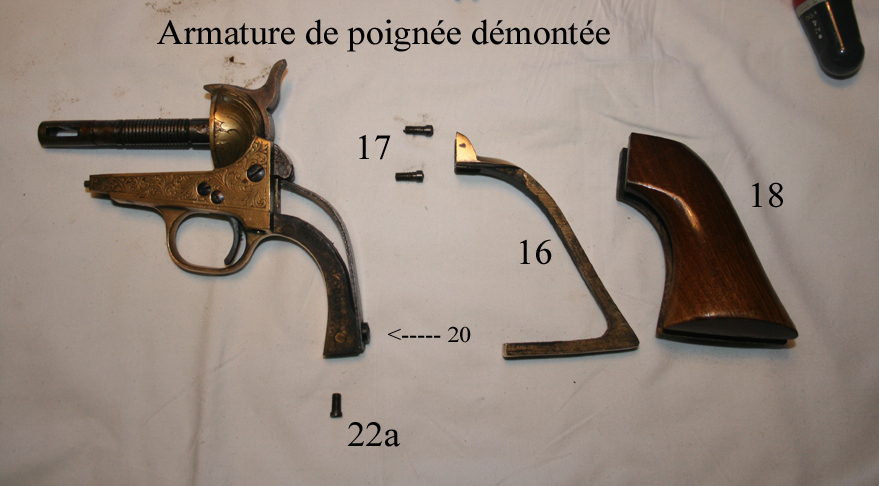
I-
Unscrew and remove the heel screw (22a)
J- Unscrew
and remove the 2 high handle screws (17)
K- The
handle And the armature detaches, separating the handle frame
(16) from the handle (18). It is not necessary to dismantle the
hammer spring (19) completely for the convenience of disassembling
the under-guard (21), the screw of the hammer spring (20) may
be partially desiccated.
L- Unscrew and remove the
front under-guard screw (23)
M- Unscrew and remove the 2 backscrews (22), the under-guard comes
off as soon as the hammer spring is released.
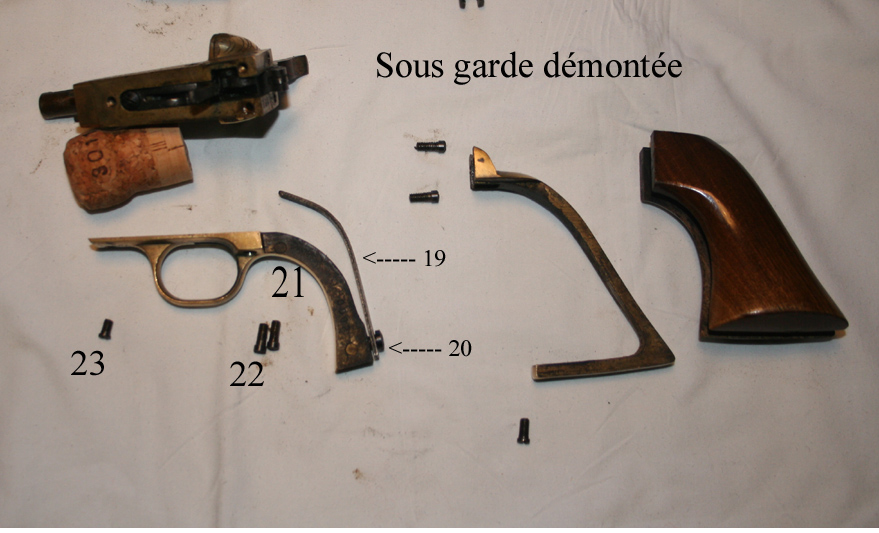
Then dismantle the mechanism.
N- Unscrew and remove the retaining spring and
trigger spring screw (15)
O- Remove the spring
(9)
P- Unscrew and remove the expansion pin (11)
Q- Remove the trigger (7)
R- Unscrew
and remove the retaining cam shaft (10) and remove the retainer.
8).
S- Unscrew and remove the shaft from the hammer
(12) The hammer can now be removed from the underside of the frame
by driving the lifting finger (2) and its spring (3) together.
These two parts must not be separated because They are blocked
from factory.
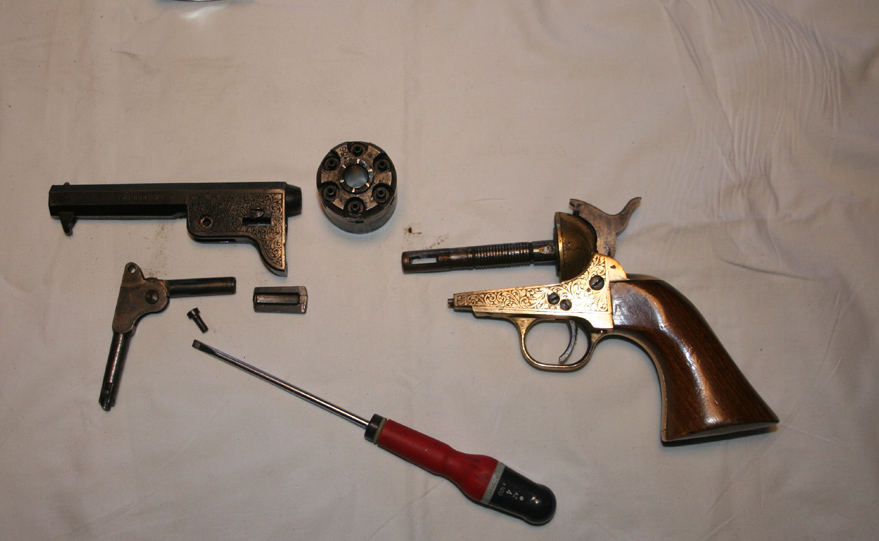
With the mechanism completely
removed, thoroughly clean each piece to be removed from any black
powder residue. Oil each piece when reassembling.
It is not necessary or even advised not to touch the barrel shaft
which has been fixed and adjusted by the manufacturer, do not
disassemble the handlebars, do not touch the axles (4) (6) (30),
the pins (14 and 41) and all other small parts (5, 29, 35, 36,
39)
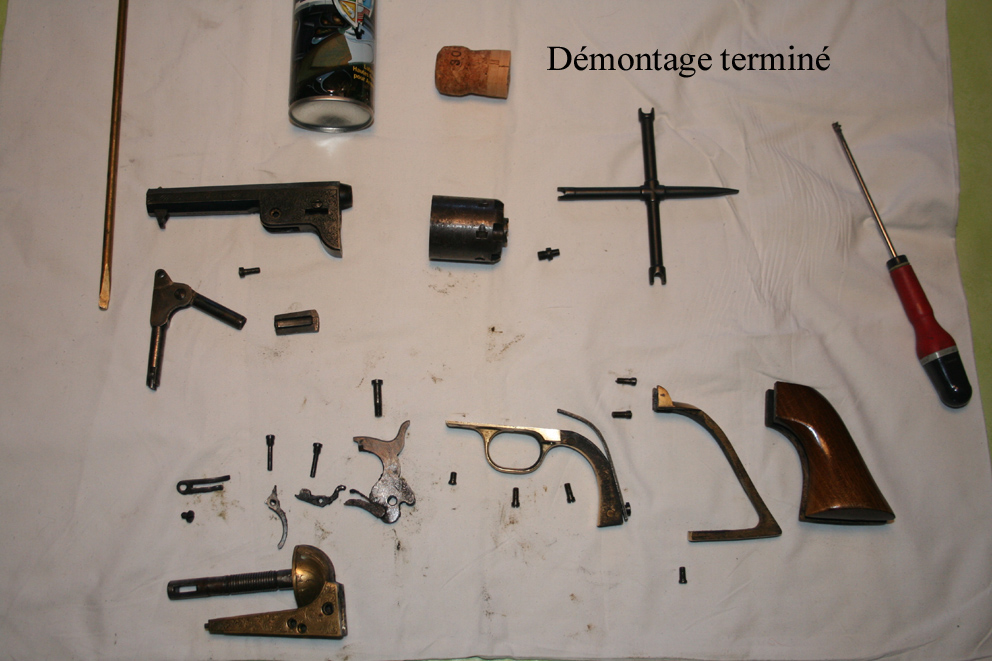
Dismantling finished all the parts are present it is enough to
clean everything with the water and soap to remove all the residues
of black powder without forgetting of of all oil to the reassembly
Reassembly:
Proceed in reverse order. There is no difficulty if you follow
the reverse order except for the hammer spring which is very easy
to go up if you observe the following method well.
In order to engage the spring of the hammer under the hammer roller,
the hammer spring screw (20) must be unscrewed in part before
the under-guard (21) is put in place, the 2 rear sub-guard screws
And the hammer spring underneath the roller and firmly tighten
the hammer spring screw (20) which has the effect of bending the
spring. This is an exemplary simplicity, although it could be
difficult if the hammer spring were screwed completely before
putting the guard back in place.
When replacing the barrel, do not forget to put the hammer in
the half-cocked position, to lower the cam to stop the complete
insertion of the barrel on its axis.
As can be seen from the photographs with the years, the deposit
of the residues of powder to well marked the brass at the level
of the in custody, proof if it is necessary that the weapon must
be cleaned regularly, which the former owner of The weapon had
undoubtedly neglected.
PS; I could have used a new weapon to make more beautiful pictures
of this demonstration but the pedagogical part would not have
been conclusive because some people could have believed that it
was useless to disassemble all this for the maintenance, believing
that The black powder only dirty the barrel and the barrel, proof
here that the powder fouls everywhere.
![]()